
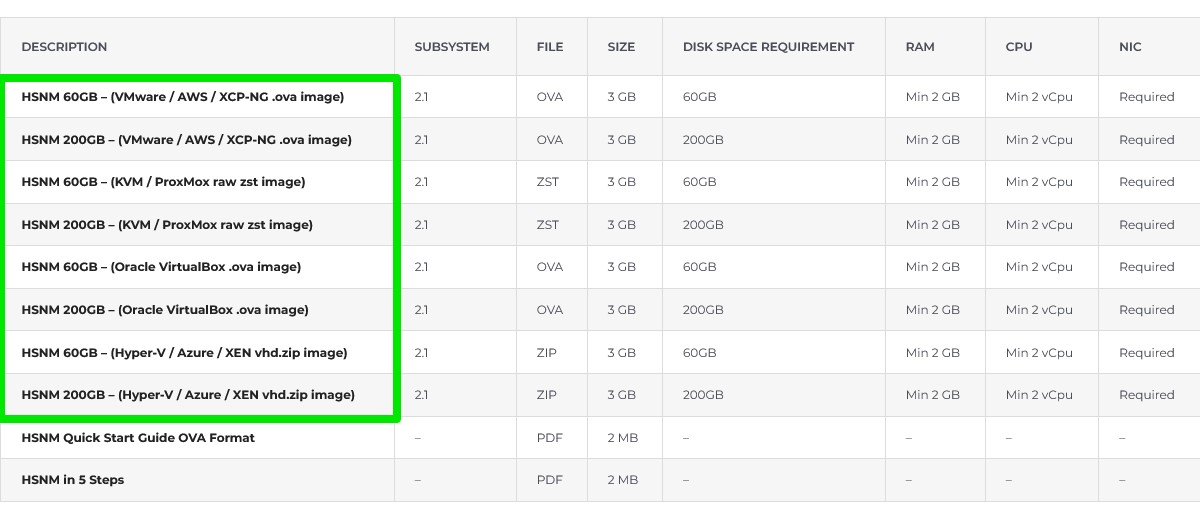
If you need to deploy your SMS Station on your infrastructure/network or on the cloud, you need to download the relevant version of the SMS Station based on your Hypervisor.
SMS Station is ready out of the box for the following Hypervisors:
All you need to do is to download your Hypervisor version of the SMS Station VM.
Open a web browser and go to the link we have emailed you.
Select the VM based on the Hypervisor you have previously chosen:
Then follow the official vendor’s guide for importing the SMS Station VM:
Once you have the SMS Station VM imported and run into your Hypervisor, the following message will appear on the console:
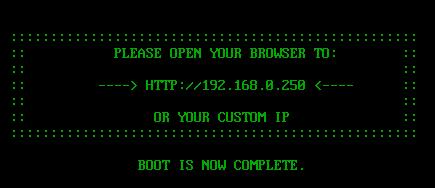
Now you can login into SMS Station to configure it by connecting, through a web browser, to http://192.168.0.250
Warning Do NOT set up the IP address 192.168.0.250 on the PC used to configure SMS Station because this is the default SMS Station IP address.rnrn
Warning Make sure your PC can reach the default SMS Station network subnet 192.168.0.0/24
Warning Suppose you are not able to reach SMS Station through IP 192.168.0.250. In that case, we suggest to run the SMS Station VM locally on your PC following the previous steps from point 1 to point 5, set the IP address based on your infrastructure or cloud network, turn the SMS Station VM off and then migrate it to the production server using your Hypervisor dedicated tool.